Showing posts with label Painting. Show all posts

Saturday, 3 August 2019

Retro 80's time + Blog News

Blog News
I now have an instagram account...
I'll be posting lots of miniatures that are already in the Eureka catalogue and stuff I've painted for Eureka, as well as scale model stuff, toys from my extremely un-focussed toy collection and maybe images from my book and comic collection too.

This link will take you there, or you can search on the instagram app for kosta_heristanidis so please find me and follow.

Having used the app for about two weeks, the ease with which photos can be shared is pretty appealing, and this is slowly overcoming my natural tendency towards secrecy. This blog will continue, as it's an excellent format for larger posts and continuing projects.

Takin' it back to the 80's
I've been enjoying Stranger Things 3, and was thrilled to spot men wearing Soviet NBC (Nuclear, Biological, Chemical) gear on-screen. 

Stranger Things 3, episode 5

Figures kitted out in this fashion made up one of the earliest sets of modern (by which I mean post-WW2, though these models are better described as 'Cold War') soldiers that I sculpted, and I still have a huge fondness for these models.

With that, I thought I'd share a couple of group photos. 
The range is quite comprehensive, with mortar, Sagger ATGW and DShK HMG teams, as well as flame-thrower, RPG and even specialised radiation-detection troops.


Here is some of the reference I used when planning this range. Hardback Salamander and Bison books showcasing the world's armies were commonplace in the late 70's and early 80's. I never used to rate them as a kid - but I have a fondness for them now and have collected quite a few.

'The Footsoldier' by Martin Windrow with illustrations by Richard Hook is a superb illustrated book published in 1982. My local library used to have a tattered copy which I borrowed over and over. I managed to find a second-hand copy in pretty good condition.

Osprey's 'Inside the Soviet Army Today' by Steven Zaloga with illustrations by Ron Volstad is packed with info, and Volstad's illustrations are always great. Try to get an actual printed copy if you can, as  Osprey's 'print on demand' books are pretty flimsy and poorly printed in my opinion.

Illustration: Richard Hook
Illustration: Ron Volstad

Here's a link to where these miniatures can be purchased, so if you're in the mood for some 1980's horror/sci-fi action, you know what to do! 


Wednesday, 4 April 2018

Modern Afghan Bikes.

New additions to Eureka Miniatures' 28mm Afghan Guerilla and Middle-Eastern civilian ranges are on their way.

Here are some shots of the militants that I recently sculpted (and just painted!) atop the 1980's style dirt-bike that I also mastered. As well as the armed guerillas, there is also a lookout (or 'dicker' in military slang) talking into a phone.

Alan Marsh sculpted the wonderful Afghan families, each balanced on a single bike, and also sculpted the Muslim civilian figures that I painted for this post.


The 28mm Afghan range is pretty complete now. There is also a Dshka on a ground-mount, as well as one or two other figures that I didn't get around to painting, but should be in the Eureka web-store soon.

Bye for now!


Thursday, 11 January 2018

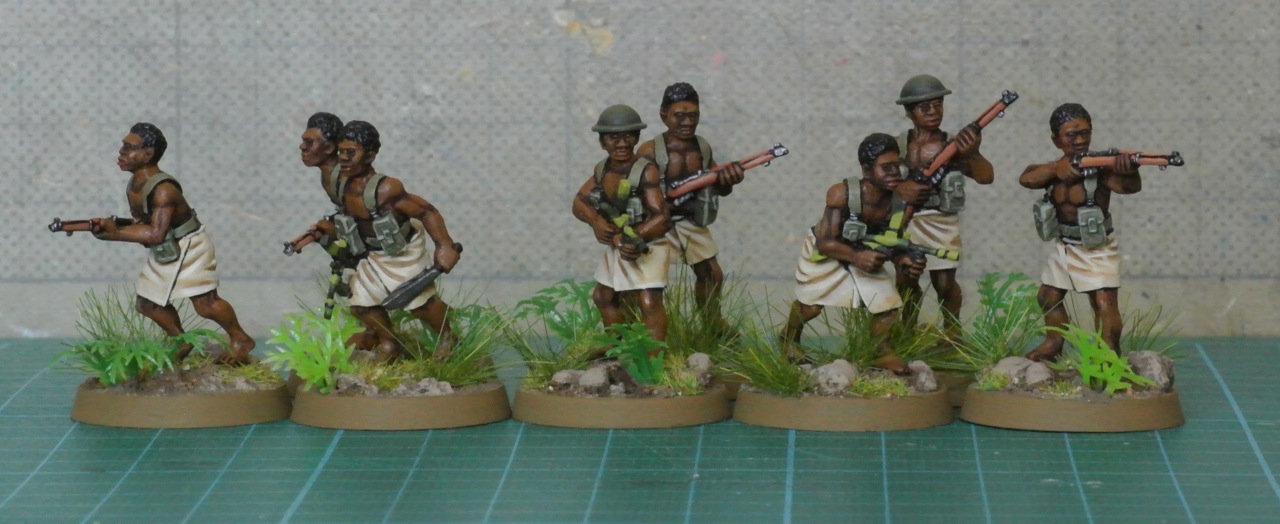
28mm Papuan Infantry, now with paint (and a Bren gun)

In my previous post I shared photos of the Papuan Battalion infantry figures that I'd just sculpted.
Here are some of those miniatures painted up, plus a painted Bren team that I made to round out the set. I adapted my usual skin-painting technique (detailed here ) for these figures, which will be on display at the Eureka Miniatures stand at Cancon later this month.


I thoroughly enjoyed researching and sculpting these, and I'm really pleased with the final result.

Finally, Happy New Year to everyone reading and following the blog, and all the best for 2018.

Kosta

Wednesday, 13 April 2016

Painting tutorial - Smelly and Old-Fashioned

A while ago I was asked if I would detail my technique for painting skin areas on miniatures and so below I present photos and captions that will illuminate my deepest painting secrets.
The examples are mostly Eureka Miniatures Iraqi civilians in 28mm.

Before we begin it's worth mentioning that this technique is something that has slowly evolved and that I find produces the easiest and most pleasing results for me personally. If you're not averse to using enamels then by all means give it a try.

Humbrol enamel paints, being 34 Matt White, 60 Matt Scarlet, 61 Matt Flesh, and 62 Matt Leather. Burnt Umber artist's oil paint. Dulux Quick Dry metal primer. You will also need some thinners (turpentine) both for thinning paint and washing brushes.


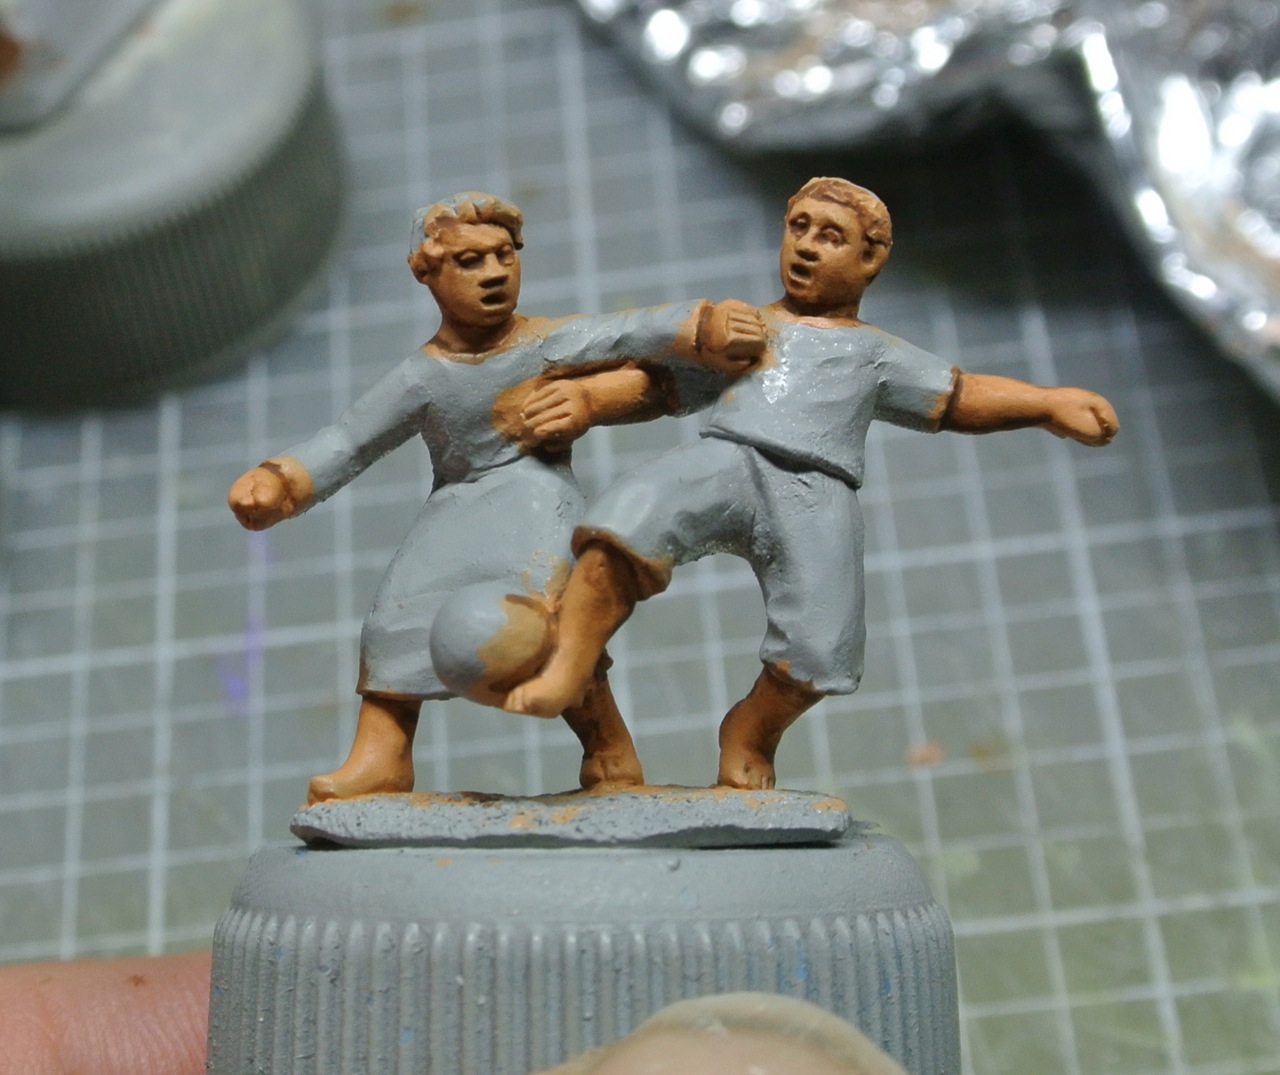
After undercoating, apply the base colour for the flesh areas. I'll call the three basic skin tones "light", "medium" and "dark". Base colours from L to R : Light skinned female 34 White + 61 Flesh. Light skinned male 61 Flesh. Medium skinned male 61 Flesh + 62 Leather. Dark skinned male, 62 Leather.
I usually apply two thin coats. The second coat must be fully cured before the next step. 

 Squeeze a small amount of the Burnt Umber oil paint onto a piece of cardboard, and let it sit for 5 -10 minutes. This will drain some of the oil out, allowing the paint to dry more quickly and with more of a matt finish.  For shading a light skinned figure, mix the Burnt Umber with some 62 Leather and thin with turpentine. Using the thinned mixture, block in the  areas where the shadows will be. You don't need to be too neat.


Now this is the fun bit. Moisten a clean, fine brush with a small amount of turpentine. Dab most of the turpentine off. Using the tip of the bush, feather and soften the shadow tone, fading it into the base tone. You only need a small amount of turps on the brush, and wash the brush in turps after feathering every small area. In the above photo you'll see the result of this feathering. If you remove too much of the shadow tone you can apply a little more and until you're happy with the amount of contrast.

So just to repeat what the technique is, the above photo shows the shadow areas blocked in with the mixture (burnt umber oil paint + Humbrol 62 leather)

                        ... and here the shadow colour has been feathered into the base colour.

The same approach is used on darker skin tones, only the shadow tone is pretty much just thinned burnt umber oil paint. Block in the shadow areas

                                  ... then feather the edges to get rid of the hard demarcation.

After the skin areas are done my next step is to line in all the overlapping bits of clothing and also put a black line between cloth and skin areas, being careful not to get any black on the skin bits. I use a black acrylic for this. Obviously if you use a black undercoat you won't need this step, but I generally use a grey undercoat because it causes fewer hassles when using bright colours later on.

I forgot to add that there are some small touches needed to complete the face and hands.  A little pink (61 Flesh + a tiny bit of 60 Scarlett) applied to the lower lip and cheeks. Miniatures of both males and females will benefit from this, though it really is crucial for female miniatures. Feather the edges of the pink on the cheeks to get a soft effect.
Some thin Burnt Umber lines between the fingers are added too. 

And there you have it!  Now the clothing areas can be blocked in, then shading started. I use acrylics for the clothing and equipment, with different tones being built up in a number of glazes.

I hope this tutorial will be useful to anyone thinking of moving back in time to use oils and enamels. The longer drying time makes these paints pretty forgiving and speaking personally more fun for some jobs. Remember to work in a well-ventilated area when using oils, turps and enamels.